
VLM Requirements:
- 2 x virtual processors
- 1 Gb RAM
- 32 GB Virtual hard disk capacity
VLM Download
Download the VLM from Kemp Download Link (52 Mb), once download is complete you will need to extract the content from the compressed folder. For this guide I extracted the files to "D:\Virtual Machines\LoadMaster VLM"Importing the VLM
To import the VLM follow these instructions.- Open the Hyper-V Manager and select Import Virtual Machine… from the Action Pane

- Click Next >

- Click Browse… button and select the folder you extracted the downloaded file too.
- Click Next >

- Select the VLM, and click Next >

- Select the Copy the virtual machine (create a new unique ID) option.
- Click Next >

- You can change the virtual machine location, or use the Hyper-V server defaults
- Click Next >

- Click Browse… to select the location of the virtual hard disk
- Click Next >

- Click Finish, and let the VLM import to your Hyper-V server


VLM Network Adapter Settings
Before the starting the VLM the network settings must be checked on the Hyper-V guest.- Right-click the virtual machine in the Virtual Machines pane
- Click Settings… option
- Click on the Network Adapter option within the Hardware list
- Ensure that the network adapter is connected to the correct Hyper-V virtual network

- Expand the Network Adapter, select the Advanced Features and select Static in the MAC Address
- Ensure that the Enable MAC address spoofing is checked

- Click OK button
- Repeat these steps for the second network adapter


Start VLM and License
Once the VLM has been imported and the network settings have been checked you start the VLM from the Hyper-V console.- Right-Click the Virtual Machine in the Virtual Machines pane
- Click Start
- Right-click the VLM and select Connect to open the console window

- The VLM should get an IP from DHCP, browse to that address via a web browser
- You receive a certificate warning:
Internet Explorer:-
Google Chrome:
- Click Continue to this website (not recommend) or Proceed anyway (Depending on web browser)
- The Root certificate can be downloaded\installed later
- The LoadMaster End User License Agreement screen appears. Please read the license agreement and, if willing to accept the conditions therein, click Agree button to proceed
- The LoadMaster will then ask if you are OK with the LoadMaster regularly contacting Kemp to check for updates and other information
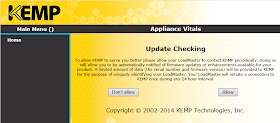
- Click the relevant button to proceed

- Before the VLM can be used it needs to be licensed, this can be done either Online or Offline
- Both methods require a Kemp ID, to register complete registration form
- You will then be prompted to login to the VLM

- Enter Username bal and Password 1fourall, the VLM will ask you set a new default password

- Enter new password and click Set Password

- You will be prompted to login into the VLM again, this time with your new password


Kemp Software Version: 7.1-16(Hyper-V)